Honda MSX125 R&G Tail Tidy review | Project Africa Grom
By John Milbank
Consumer Editor of Bennetts BikeSocial
04.12.2017
Tidying the tail of my project Honda MSX125 could be considered counter-intuitive. Called the Grom in the states, where the machine has an even greater cult following than here in the UK, I’m making a mini-Africa Twin replica – simply because I want a lightweight, fun machine that’ll take me across the UK’s byways without the bulk and weight of my KTM 1050 Adventure.
To meet homologation laws, bikes must carry their number plate behind the rear wheel, hence the long plastic tails of so many machines. I have to admit that the long chunk of plastic hanging from my Grom’s tail is an effective mudguard, so why would I take off something intended to be used in winter and across green lanes? Honestly… just because it looks good…
The original tail unit is pretty easy to remove, but surprisingly heavy due to its internal metal frame
Fitting
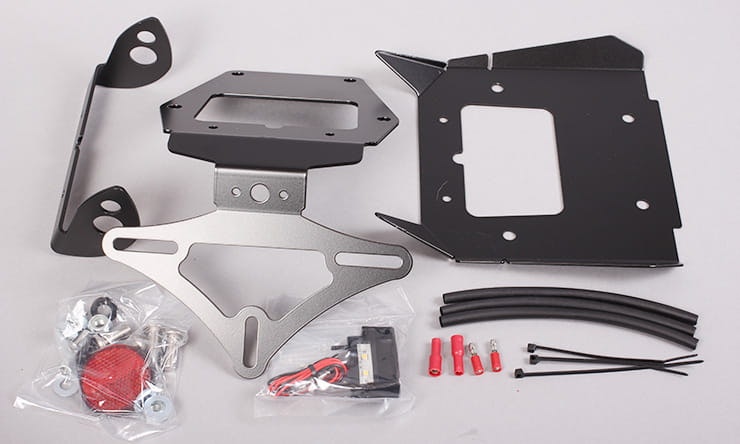
The R&G Tail Tidy is made of painted stainless steel and available with brackets for OE or aftermarket mini indicators. I prefer full-size flashers, and they fit the new unit well. Assembling the tidy is pretty simple, with fairly clear instructions, though there are a couple of anomalies, like the manual saying to use a 13mm spanner for the indicators when it’s a 14mm, or the supplied M6 bolts being a touch short; there are three plates that make up the unit, but if you use the washers those bolts don’t quite bite into the nylon section of the lock nuts. I left the washers out and it all went together nicely; it looked neater, it’s no weaker in this case, and the paint wasn’t damaged as I tightened the fasteners.
The R&G Tail Tidy is extremely compact. To pass an MoT, you’ll need to stick the supplied reflector onto your number plate
An LED number plate light is supplied – once you’ve super-glued the hood on, you pass a length of heat-shrink tubing over the two cables. This tidies it up nicely, but I couldn’t get it all over. Measure it up though and you soon realise you don’t need it all in order to cover the visible area before the wires disappear into the underside of the motorcycle.
Once all put together, the unit offers up easily to the bottom of the bike. The instructions suggest a dab of grease on the spacers that go between the tail tidy and underside of the motorcycle, but they still moved as I jiggled everything into place – I found it easier to tape the bolts into place, spin the nuts on inside the bike, then whip the tape off before tightening everything up. Just be careful during assembly as I dropped a nut down one of the frame tubes – I got it out eventually as it stopped half way, but it’s best to avoid being cack-handed like me. Needless to say, I did do it again, but that time the nut rolled all the way down and out the bottom.
Crimps are supplied to wire in the new tail light and unfortunately you’ll need to cut the bike’s wiring – the only way R&G could have avoided this would have been to make a large new section of loom, which just wouldn’t have been practical. You’ll need a crimping tool, but I’d recommend soldering instead, and using some of the left-over heat-shrink for a more durable connection.
Styling
There’s no way this tail could be any more compact – R&G has really tucked everything away well. Removing the original unit and bolting this in place saves a hefty 546g (the OE part has a metal frame inside, which adds to the 1360g mass, without indicators). On a bike that weighs just 101.7kg, ready to ride, everything matters!
Unavoidably, there are gaps that could let spray and dirt into the tail unit, but most of them can be sealed with a little silicone. Where the tidy meets the MSX’s side panels, there’s also a slight gap, but sealing this would make it harder to strip the bike down in future – tape would be best here if necessary, but it's no worse that the gap caused by the original part.
Ultimately, if you’re using the little MSX125 for the average summer riding, there’s no issue with the gaps – any water that could be thrown in would be minimal – but as I’ll be hacking through mud and (with any luck) snow, I’m just taking a little extra effort to avoid too much moisture driving into the battery and fuse area.
If you want to reduce the clutter behind your Grom’s seat as far as possible, this is about the tidiest and best thought-out tail tidy you’ll find.
The R&G Tail Tidy costs £101.99 and is available from www.rg-racing.com
The tail couldn’t be more compact now. There are a couple of slight gaps, though they’re not visible from the outside, and might only be an issue if you ride in the wet a lot
Share on social media:

